
LED lights don’t just light up rooms but also the young minds when combined with creativity. The light-emitting diode is basically a semiconductor material that produces light from electricity.
Kids can have an amazing time with these LEDs exploring more about them. These lights can sparkle creativity within the mind of your children. The curiosity to explore and learn more is the key to inventiveness. Kids have the greatest imagination and need the right tools to turn their imagination into innovation.
Things To Consider Before Starting The DIY Activity
Below are few things that you should always keep in mind:
Make sure your kid is never left unattended while working with LED lights DIY projects
Water shouldn’t be there in a close vicinity
Your kid should at least by 7 years of age
5 Craft Ideas Using LED Lights
Here are a few simple craft ideas using LEDs that your child might look for to invent something of his own.
LED Poinsettia Flower Bouquet
LEDs are fun. Decorating your child’s bedroom or the balcony with LED lights can keep the whole atmosphere illuminated. The amazing LEDs from reputed sources like el star are bound to make your kids happy, and these lights are totally safe!
You can take either colorful papers or tissues and make flowers out of them. Follow the below steps for a fun DIY activity with your kid:
To make a paper flower, first, take a piece of color chart paper.
Draw a flower on it and cut that piece out from the chart.
Similarly, make two more poinsettia flowers and cut them out. Then glue the flowers behind one another.
Now make a hole in the center of the poinsettia flower and attach the LED light.
You can make some more flowers using LED lights in the center and put all of them into a plastic pot or any container.
This flower bouquet would look so unique. It would glow your entire balcony with glimpses of blossoms all around.
Sparkle Mirror Garland
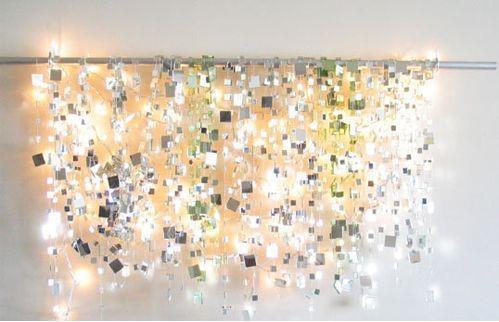
Source: Pinterest
To make this sparkling mirror garland, you can take a piece of mirror to cut it into small squares of your wish or you can also use CDs that are no longer in use. Follow the below steps for a fun DIY activity with your kid:
Cut them into small pieces of square or any shape you want. Use sharp scissors or paper cutters and carefully slice taking a perfect measurement. (at least keep 3x3 cm )
Take the fairy light strings you have and unwind them properly.
Glue the square pieces you have made with the tip of every light bulb.
You can use scotch tape instead of glue as well.
This is how your fairy garland is almost done. To hang the light strings:
Take the rod that you already have in your room with the curtains hung on.
Tie one part of the string to the rod or you can use scotch tape to attach it with the rod. Similarly, tie all the strings with an even distance from one another.
Now plug in the lights and let your room glitter.
The sparkle mirror garland would look aesthetically beautiful. Switch on the lights to shimmer and let the magic happen.
The Hula Hoop Chandelier
Renovate your kid’s room with this simple trick, and the best part is, you can also take help from your kids!
Get a Hula hoop from the market or you can use any loop that you already have at your home.
Take some colorful laces or any fabricated cloth to cover the hoop completely.
Unwind the fairy light strings carefully and wrap them around the Hula hoop gently. Hang down some lights as well to the convenient length. Hang the hoop in the ceiling and switch on the lights.
LED Lights In The Bottle
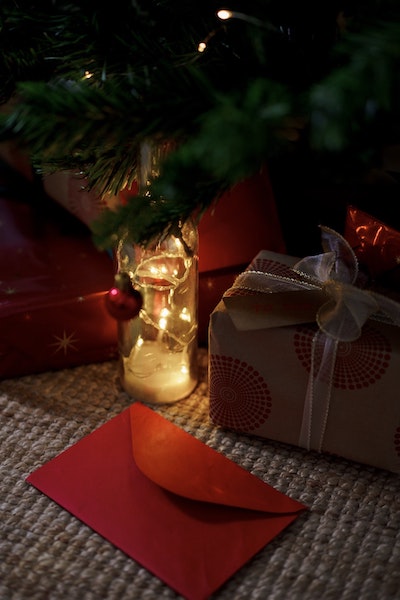
Source: Pexels
This is probably the simplest yet the most satisfying and beautiful DIY that you can do with your kids.
Just take a glass decorative bottle of your choice, and some LED lights. Now, just wrap around the LED lights, so that they can fit into the bottle. Once in the bottle, you can place this bottle at any nook and corner of your house, to enhance the area’s beauty.
This DIY can also be used for Christmas decorations, or surprise or birthday party decorations.
Tinkerbell Lights
These tulle light strings bring a fascinating appearance to your kid’s room. Before getting started, you need the following materials; LED string lights, 1-4 yards of glitter tulle, rubber bands, and scissors; to make this DIY craft.
The first step you need to do is, cut the tulle into roughly 8x8” squares. Cut out similar square pieces of it, one square per light.
The next step is to tie the tulle around each light. Taking the help of rubber bands, tie the square-cut tulles around each light bulb. Make sure the knot should be perfect.
In case, you want your Tinkerbell lights to look more beautiful, you could color the tulles. Using fabric dye, you can give your tulle any color you want.
Your next step is to adjust the tulle around the LED light so that it surrounds each light perfectly.
To give it a catchy appearance, decorate it with strings or colorful ribbons.
Conclusion
Kids of course enjoy making their own crafts and decoration whacks. These are some basic ideas that you might need to give wings to your thoughts. Using LED lights you can make wonderful crafts and DIYs.


No comments
We love hearing from you! Thanks for leaving us some comment love! If you're a new follower, please leave your link, so we can follow you back!