


The winter months can be pretty harsh on one's skin, hair, and nails. Many of us suffer from dryness this time of year, and for me, my fingernails really take a hit. From cracking and chipping/breaking to extra dry cuticles, my fingernails usually look pretty bad. The last professional manicure I had was when my hubby and I tied the knot, over seven years ago! Manicures look great, but for me, they're not all that practical, and they can be pretty pricey, depending on what you have done.
Painted fingernails have really made a big comeback over the past two or three years. I have pretty much always been a fan of 'clean fingers' (thank you, Julie Andrews as Queen Clarice, via The Princess Diaries). When I finally gave into painting my nails again, I quickly remembered why I never really wanted to deal with painted nails in the first place- even a home manicure can be time consuming, polishes and tools are expensive, and a day or two later, you can expect to see anything from chipping to cracking, which is super frustrating!
Presented by Molly Connell, Independent Consultant
Jamberry Nails came on the scene a few years ago, and was founded by three sisters, who loved to spend time together and have their nails done. After a day at the nail salon, they realized that there had to be a better, more cost effective way for women to keep their nails looking pretty and polished, and still be able to spend that cherished time together. In 2010, the sisters developed a DIY at home application, and a wide variety of designs quickly took off. Sales soared, and the rest is history! Today, Jamberry gives a while new meaning to nail art!
Molly Connell is a wife and mom, to two beautiful daughters. She is a teacher and volunteer, and owns her own business through Jamberry Nails. We're very excited to have Molly join us as an MBP Spotlight Sponsor, sharing the latest nail art trends and Jamberry designs with us.
I was very excited for the opportunity to work with Molly, and to be reintroduced to Jamberry Nails, presented by Molly. Jamberry has such an incredibly wide variety of nail wraps to choose from. No matter what your style may be, Jamberry is sure to have a design that you'll want, and feel proud to wear.

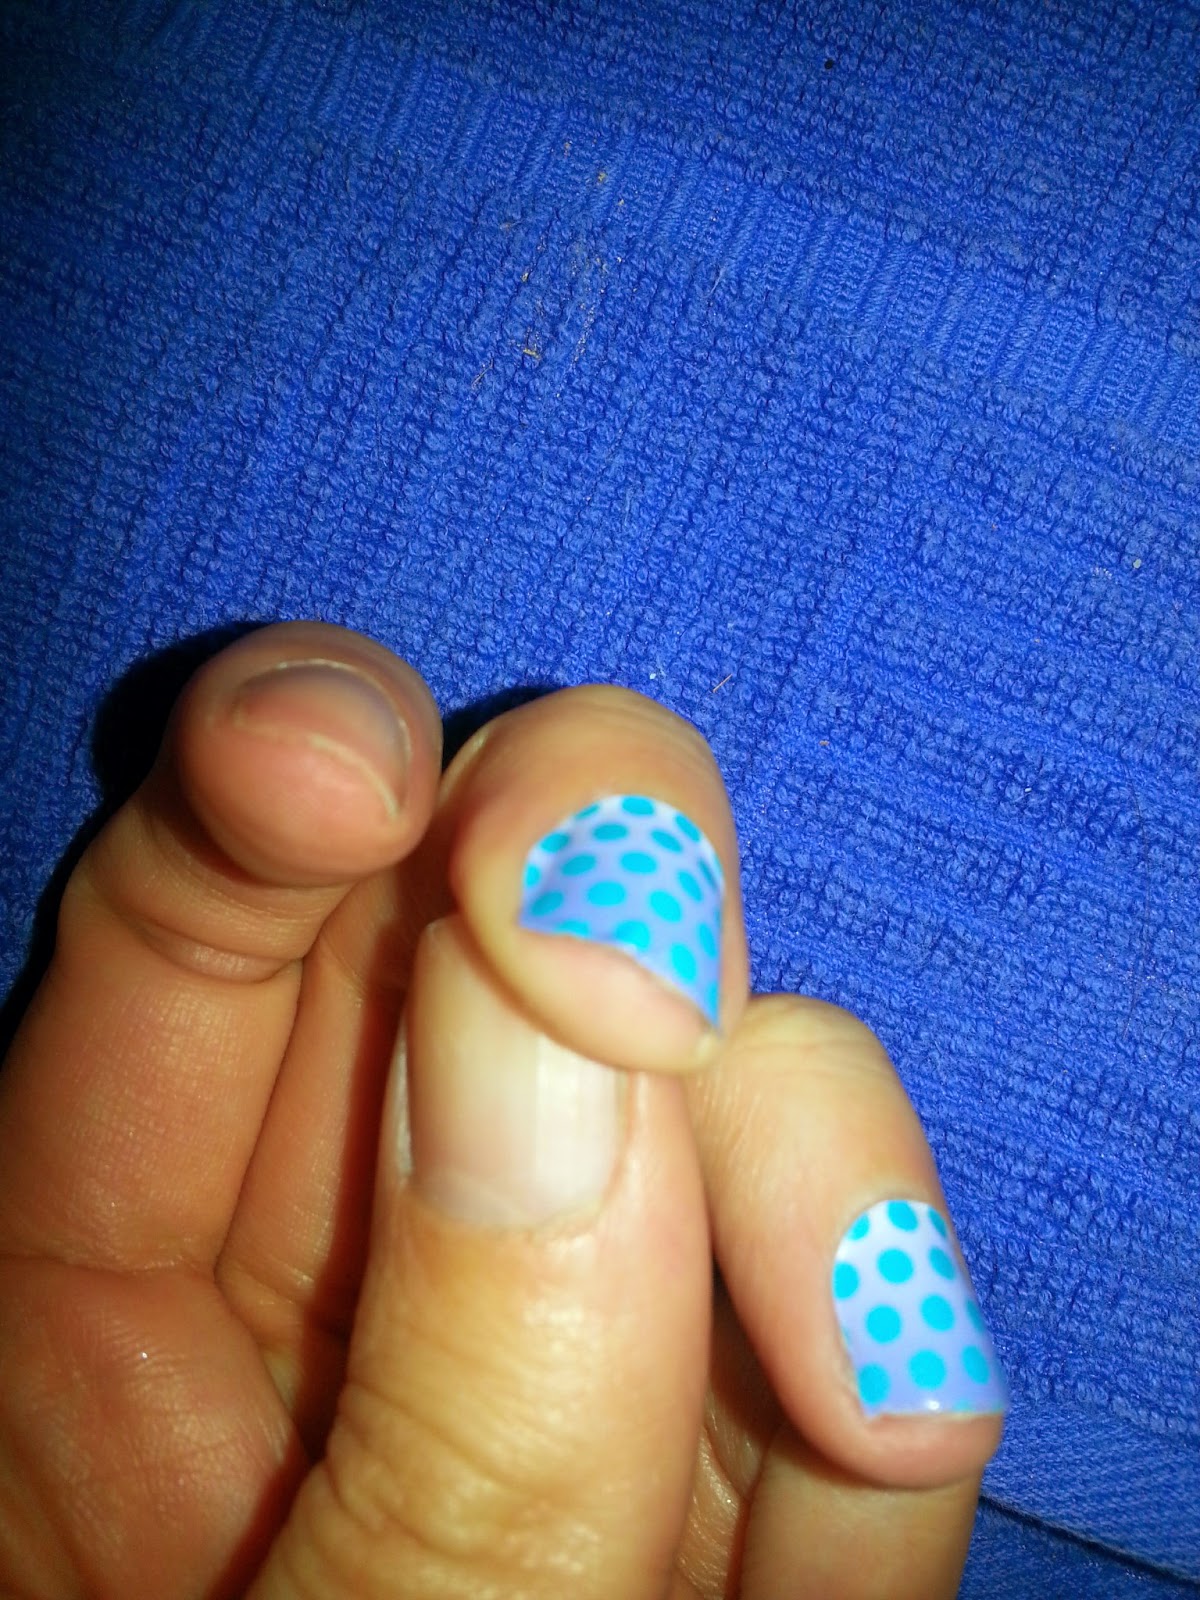
Molly brought me a beautiful and fun blue dot pattern, which was a December Hostess Exclusive.
I don't usually go for colors that are out of my comfort zone, but I loved the look of the faded blue background and light blue dots on these nail wraps. Something about them really captured 'winter' for me, without being too cute. I couldn't wait to see what the patterns would look like on my nails!

The Jamberry Nail Wraps come packaged in a cute little envelope. The application instructions are printed directly on the back of the envelope, which I appreciate. There are no tiny pieces of paper that may wind up lost.

Jamberry Nail Wraps come 18 to a sheet, giving you plenty of coverage for your fingernails, toenails, or both!
Molly gave me a Jamberry nail file, and a rubber pusher tool, which were both a big help to me, as I applied the nail wraps. Molly advised me to clean my fingers well, push my cuticles back and clip off and excess, and to make sure I had a good pair of cuticles scissors on hand to help me cut off the excess on the nail wraps. Molly also told me that it would probably be a good idea for me to watch the Jamberry Nail Application Video, which would show a step by step process on how to correctly apply the nail wraps. So, before I did anything with the nail wraps, I watched the video.
After I felt that I had a good idea of what I needed to do in order to apply the nail wraps, I headed to my powder room, where I have a large vanity counter that I could use as my work space. I laid out all of my tools, including the nail wraps, file, cuticle pusher and scissors, and the pusher tool from Molly, as well as my hair dryer.

The Jamberry Nail Wrap application instructions are also printed on the Jamberry Nails website.
I kept both my instruction sheet, and my tablet on hand, so I could go back and watch the video, if I felt like I needed to. To start the process, I clipped, filed and cleaned my fingernails. I tried to get them as short and even as I could. This would be my very first experience with using Jamberry Nail Wraps on my fingernails, as I have only ever used them on my toenails in the past.

The first step, is to match your nail to the correctly sized nail wrap.

Apply heat for about five seconds to the adhesive side of the nail wrap, and then carefully fit the nail wrap over your fingernail, and press onto the nail. Apply firm pressure, and use the rubber cuticle pusher to smooth the nail wrap out, push out any bubbled or lifted areas, etc.

Trim the top with scissors, to fit your nail, and then using a downward motion, file off the remaining nail wrap.
Truth time- I totally goofed when I applied the first wrap. I trimmed off the excess nail wrap with scissors, instead of just using the file. Once I realized I missed that step, I figured out that it works much better if you do it the right way!

Apply heat and pressure to the nail once again, until the nail wrap is bonded to the nail. Here, we have one down, and nine to go!
Not every nail wrap was a perfect fit to my nail, and I didn't expect them to be. I just went with the next size up, if a nail wrap seemed too small. I tested the nail wrap on my nail first, so I would have an idea of how much needed to be trimmed.
You can see the excess on the side of the wrap. This is the area I slightly trimmed to fit my nail.

In the end, I wound up with beautiful nails!
The entire application process took me about 40 minutes. I sort of struggled with the application of the nail wraps on my right hand, because I'm not really used to doing intricate work with my left hand. All in all, I was very pleased with the way my very first Jamicure turned out, and I would gladly do it again. I have enough nail wraps left on my sheet to use on my toenails, for another manicure, or to share with a friend.

Loving my Jamberry Nails!
Days after applying my nail wraps from Jamberry, I am still super pleased with the way the look. I have had my hands into everything from massive dish-washing and laundry to craft time with my little man, and yard work. My nails still look great! There's been no lifting, snags, or even the slightest wrinkle! Molly did advise me to apply more heat and pressure if I did happen to notice any lifting. I like to apply a thin layer of a clear top coat polish over my nail wraps, just to help protect them, but it's not something you have to do, or even need to do to keep your Jamberry nails looking great!
Jamberry Nails has just about every color, pattern or theme you could imagine! Molly's personal Jamberry Nails website is a lot of fun to browse. I am already looking through the designs, thinking about what I want to use on my nails this spring and summer. The Jamberry Nail wraps are great to apply before you head to the beach, or if you plan to hit the swimming pool. I have found that the sand and chlorine really tend to mess up a mani/pedi, so Jamberry Nail Wraps are the way to go!
Check out a few of my favorite designs, available from Jamberry Nails...

Mad Mod

Tinted Classics

Boysenberry Chevron

Cherry Ice

Namaste (So cute for yoga!)

Love Spell for Valentine's Day
My best friend is getting married in October, and I can't wait to find a beautiful style of nail wraps or two that we can use! She's having a destination wedding, and I don't want to have to worry about nail disasters when I'm away from home.
Jamberry Nails also has fun Jamberry Juniors designs, Mommy & Me sets, Charity/Causes designs, and more! Shop by category, theme, or color, or design your own wraps in the Jamberry Nail Studio! You can also purchase additional application kits and tools online.

The Jamberry StyleBox
Monthly Subscription Boxes are hot right now, and Jamberry is offering a monthly StyleBox for just $25.00/mo. The box includes two sheets of nail wraps, and tools, plus a style guide. Considering that one sheet of nail wraps is $15.00, this is an incredible value! The nail wraps are delivered to your door, styles based on your personal preferences. This totally takes the guesswork out of selecting your wraps, and going through repeated ordering. The StyleBox would also make a great gift for Valentine's Day (or anytime!).

Want them? Get them!
Jamberry offers so many great designs for Valentine's Day! These lovely nail wraps would make a great gift, or would be so much fun to wear in the days/weeks leading up to Valentine's Day (which is now!). Head on over to Molly's personal Jamberry Nails website to browse the latest Jamberry Nail Wrap designs, learn more about the color of the year (Marsala), or to place your order. If you have any questions about the products, ordering process, or would like more information on hosting a party, or staring your Jamberry Nails business, please contact Molly, who would be more than happy to assist you.

Want to host a Jamberry Nails Party?
The easiest way to earn free Jamberry Nail Wraps is to host a Jamberry Nails party with Molly- which can be done in home, or online. During the month of January, double the hostess half credits when your party reaches $400! Interested in starting your own Jamberry Nails career? Contact Molly for more information!

Want them? Win them!
One lucky reader will win 1 sheet of Jamberry Nail Wraps from Molly! Please note that the above sample is an example, and not necessarily the pattern that will be sent to the winner. Just use the handy RC entry form below to enter for your chance to win! This giveaway is open to US residents, 18 and older.
Special thanks to MBP Spotlight Sponsor, Molly Connell, for allowing me to experience and share about the awesomeness of Jamberry Nail Wraps, and for offering this fun giveaway for our readers! Be on the lookout for another Jamberry feature with Molly this spring!
Good luck, and stay stylish!


i like midnight celebration
ReplyDeleteMe too!
DeleteMelt my heart
ReplyDeleteI like Love Potion too!
ReplyDeleteI like Cherry Ice.
ReplyDeleteI like the Silver Floral on Magenta
ReplyDeleteI like the moon glass wraps.
ReplyDeleteThank you
I really like the rose gold sparkle.
ReplyDeleteI love the melt my heart design
ReplyDeleteI like the sugar and spice pattern!
ReplyDeleteI would like the love potion wraps.
ReplyDeletethe love spell!!
ReplyDeleteI totally love MELT MY HEART!
ReplyDeleteI think the Silver Floral on Magenta is pretty.
ReplyDeleteI like the champange toast for a date night out
ReplyDeleteI'm loving the Love spell set
ReplyDeleteI love the Shamrockin' and Emerald Argyle.
ReplyDeleteHeart Attack is my favorite Vday! And Fruit Punch is my favorite non holiday!
ReplyDeleteLove potion are also cute
ReplyDeleteI choose sugar and spice
ReplyDeleteFor Valentine's Day, either Love Potion or Love Bug would be my favorite!
ReplyDeleteI think the Icy Taupe Polka wraps are super classy looking!
ReplyDeleteLove spell
ReplyDeleteMelt my heart
ReplyDeleteCherry ice
ReplyDeleteLove spell
ReplyDeleteI'd like to try Melt My Heart!
ReplyDeleteI'd also like to try Love Spell.
ReplyDeleteI've liked Silver Floral on Magenta for awhile now.
ReplyDeleteGet Hoppy is so cute for Easter!
ReplyDeleteI like Bam Bam & Slatted Herringbone!
ReplyDeleteThanks for the giveaway!
Black Chevron for me ~ Veronica
ReplyDeleteLadies, I love all of the wraps that you mentioned above but my latest choice was Sugar and Spice. I loved that there were so many solid colors that I could pair with these wraps and get a different look each time. Our new catalog will come out on March 1st, which means that we will have Going, Going, Gone wraps the month of February. Check out my website to see the full list of the wraps that will be retired.
ReplyDeleteI also like Skinny Pink.
ReplyDeleteFor Valentines Day I love "Love Spell" All of the Designs are Gorgeous!!
ReplyDeleteI'm currently wearing Love Potion, but would love to try Love Spell for Valentine's Day, too!
ReplyDeleteSkinny pink is cute
ReplyDeleteI like Prissy Plaid.
ReplyDeleteI also Love the Cherry Ice. Such a Beautiful Red~
ReplyDeleteI would love to gift the NEWSPAPER nails to my daughter, she would love them.
ReplyDeleteMelt my heart!
ReplyDeletei love ICY PINK POLKA
ReplyDeletefreebiel0ve@yahoo.com
This wrap is retiring at the end of this month so make sure you get yours before it's too late. Mollyconnell.jamberrynails.net
DeleteVenus is pretty, too.
ReplyDeleteLove Jamberry Nails! Here's a little tip for getting the perfect fit - use clear tape (like scotch tape), place it on your nails, and use a pen to trace the shape of your nail. You can then peel the tape off your nails, place it on the nail wrap sheet, and cut out the perfect size. Its important to have a really good seal around the edges of your Jamicure to ensure they last. If your nail wrap starts to peel a little at the tip, don't just peel it off - simply apply a little extra heat and smooth it down again. You can even do this by using the heat vent in your car - manicure on the go anyone? :)
ReplyDelete